Dryer Repair
One of the "come home from vacation" chores is to get caught up on laundry. After the first load had been in the dryer for a while, I realized that it hadn't "buzzed" so I went to investigate. I discovered that it hadn't buzzed because the clothes weren't dry. And the clothes weren't dry because the dryer wasn't getting hot. Not good!
Fortunately, our internet connection was working, and Google led me to RepairClinic where I found some great videos to give me an idea of what might be wrong. I started by ordering the cheapest part - a thermal fuse - from the various possibilities, and when it arrived a couple of days later, I got to work.
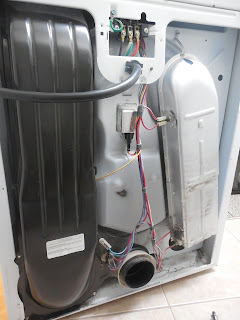
First you get to the back of the dryer, pull out the plug, detach the lint tube, and remove the cover. (At this point I was extremely grateful that one of the chores Jeff helped with last month was cleaning behind the washer and dryer! I don't like dealing with lint and dust.)
It was an easy matter to unscrew the old fuse and screw on the new one. However, that didn't solve the problem. So, I ordered another part - the cycling thermostat. A few days later I repeated the process with the same result. That meant I needed to order the actual heating element, which cost quite a bit more (although still less than the cost of a service call). And I was even able to find it cheaper on Amazon.
While I was waiting for that part to arrive, I also decided it would be a good idea to invest in an inexpensive multimeter. That's a pretty cool tool. It told me that the heating element was defective, but so was the thermal fuse that I had already replaced. The original cycling thermostat was okay. (So, if any one needs one, we have a spare!) In addition, I learned that a multimeter will test batteries. I had a couple of expensive batteries for my camera (found when I unpacked) that I thought were dead, but I decided to test them before getting rid of them. They were still good. The multimeter paid for itself in those few seconds!
 |
| The pulled out dryer, the back cover, the multimeter, both heating elements, and the thermal fuse. |
We were inconvenienced for a couple of weeks, but Wayne was quite thrilled that we got it in working order again for less than the cost of a repairman's visit. I'm pretty pleased as well.
Since I'm recording these experiences so I can remember what to do in the future, I should also mention that the very first thing you check is to make sure there's no lint buildup and that the vent pipe is clear. Many, many years ago we called out a dryer repairman and all he had to do was clean lint out of the back of the dryer. The lint trap had been broken for several weeks, and while I thought I was getting everything out, I wasn't. It would have been cheaper to just replace the lint trap when it first broke!


Comments